🧢 Beautiful ✨ Detailed πŸ’ Adorable

Lily Bunny Amigurumi Pattern

Lily Bunny Amigurumi Pattern
4.6β˜… Rating
5-7 Hours Time Needed
3.5K Made This
βœ‚οΈ

Intermediate Level

Ideal for those with basic crochet experience, featuring slightly more advanced stitches and techniques to expand your skills.

⏱️

Weekend Treat

Takes 5-7 hours, making it an enjoyable project to finish over a couple of days.

🧸

Cute Companion

An adorable friend to cherish, handcrafted with love to bring comfort and joy for years to come.

About This Lily Bunny Amigurumi Pattern

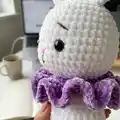
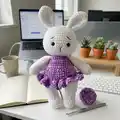
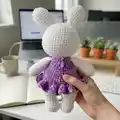
This pattern creates Lily Bunny, a plush chenille amigurumi with a sweet ruffled dress and expressive embroidered features. The design uses soft sport/chenille yarn and a simple construction split into head, body, legs, arms, ears and a skirt. Techniques include working in rounds, shaping with increases and decreases, head sculpting, and sewing parts together for a tidy finish.

Lily Bunny Amigurumi Pattern crochet pattern - detailed view of completed project

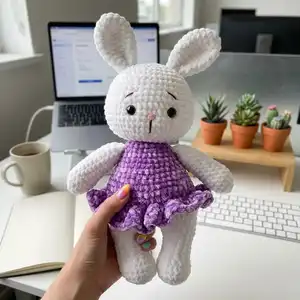
The finished toy is approximately 35 cm tall using the recommended materials and hook size. US terminology is used throughout, and the pattern difficulty is rated easy to medium.

Why You'll Love This Lily Bunny Amigurumi Pattern

I absolutely love this pattern because the chenille yarn gives Lily Bunny an irresistible soft texture that makes hugging a pure delight. I enjoy the simple shaping that produces a classic amigurumi silhouette while leaving room for little custom touches like embroidered brows or a different colored skirt. Sewing and assembling the pieces is satisfying and results in a snug, well-balanced toy that stands or sits nicely. Making Lily Bunny always feels quick and rewarding, and I love gifting these finished bunnies to friends and family.

Lily Bunny Amigurumi Pattern step 1 - construction progress Lily Bunny Amigurumi Pattern step 2 - assembly progress Lily Bunny Amigurumi Pattern step 3 - details and accessories Lily Bunny Amigurumi Pattern step 4 - final assembly and finishing

Switch Things Up

I love how easy it is to customize Lily Bunny by changing yarn colors; try pastel combos or bold contrasts to give your bunny a fresh personality.

I sometimes make a mini version by using thinner yarn and a smaller hook to create keychain-sized bunnies that are perfect tiny treasures.

If you want a chunkier, cuddlier toy, I use bulkier chenille and a larger hook for a plush, huggable result that works great as a nursery toy.

I enjoy swapping the solid skirt for stripes or a two-tone ruffle to make each dress unique; experiment with alternating colors each round for a fun effect.

For safer toys intended for small children, I replace safety eyes with embroidered eyes and securely hide all threads to avoid choking hazards.

I often add tiny accessories like a crocheted bow, a removable scarf, or a little pocket on the dress to give the bunny extra charm and play value.

Try different facial expressions by moving the embroidered eyebrows and mouth slightly; small changes make big differences in character.

I sometimes add wire inside the limbs for posability, but for a soft, child-safe toy I skip wire and rely on careful stuffing for posture.

To create a whole collection, I make the same pattern in seasonal palettes: spring pastels, autumn neutrals, or festive holiday shades for gift sets.

I recommend practicing head sculpting on a spare piece first, then transferring the technique to your finished head to control expression without overworking the face.

Common Mistakes & How to Fix Them

βœ— Skipping stitch markers when joining pieces or starting the body can cause misalignment; place a marker where indicated and check it often to keep rounds aligned. βœ— Not stuffing as you go leads to uneven shaping and hard-to-fix lumps; stuff gradually and evenly, especially in the neck and head areas. βœ— Tight or inconsistent tension results in uneven fabric and misshapen parts; maintain a consistent, relaxed tension and practice a few rounds if you change hook sizes. βœ— Forgetting to place safety eyes at the stated rounds will place facial features incorrectly; insert the safety eyes between rounds 8 and 9 with 8 stitches between them as instructed. βœ— Overstuffing the head can make closing the opening difficult and distort the face; stuff firmly but not overly, then sculpt and hide the yarn tail as directed.

Lily Bunny Amigurumi Pattern

Make your own cuddly Lily Bunny with this detailed crochet pattern. You will love the soft chenille texture and the cute ruffled skirt that gives this bunny extra charm. The pattern walks you through each part step-by-step so you can assemble a 35 cm tall toy with confidence. Perfect for gifting or keeping as a cozy handmade companion.

Intermediate 5-7 Hours

Materials Needed for Lily Bunny Amigurumi Pattern

β€” Main Fabric

  • 01
    Sport chenille yarn - White (Chenille 01) - amount to make approx. 35 cm tall toy
  • 02
    Sport chenille yarn - Purple (Chenille 13) - quantity for dress/skirt
  • 03
    Brown embroidery thread - for eyebrows and muzzle
  • 04
    Pink embroidery thread - for nose
  • 05
    White thread - for head sculpting
  • 06
    Safety eyes - 14 mm (2 pieces)
  • 07
    Polyester fiber fill stuffing - sufficient to fill head, body, arms and legs

β€” Tools Required

  • 01
    Crochet hook 5 mm
  • 02
    Safety eyes 14 mm (2 pieces)
  • 03
    Scissors
  • 04
    Yarn needle for sewing and weaving ends
  • 05
    Stitch markers
  • 06
    Polyester stuffing (fiber fill)

Progress Tracker

0% Complete

β€” Arms :

Info :

CCrochet with white yarn. Stuff only 2/3 of the arm.

Round 1 :

6 sc into a magic ring (6)

Round 2 :

6 inc (12)

Round 3 :

(3 sc, inc) * 3 (15)

Round 4-5 :

15 sc (2 rounds)

Round 6 :

(3 sc , dec ) * 3 ( 12 )

Round 7-14 :

8 sc ( 8 rounds )

Round 15 :

( 4 sc , dec ) * 2 ( 10 )

Round 16 :

10 sc

Info :

Fold the arm in half and crochet 5 sc through both sides.

Info :

Fasten off and cut the yarn, leaving a tail for sewing.

Info :

Sew the arms two rounds under the beginning of the head.

β€” Legs :

Info :

Crochet with white yarn. Stuff as you go.

Round 1 :

7 sc into a magic ring (7)

Round 2 :

7 inc (14)

Round 3 :

(sc, inc) * 7 (21)

Round 4-5 :

21 sc (2 rounds)

Round 6 :

7 sc, 4 dec, 6 sc (17)

Round 7 :

7 sc, 2 dec, 6 sc (15)

Round 8-10 :

15 sc (3 rounds)

Round 11 :

(4 sc, inc) * 3 (18)

Round 12 :

18 sc

Round 13 :

For the left leg: crochet only 14 sc Fasten off, cut the yarn.

Round 13 :

For the right leg: 18 sc Don't cut the yarn, we will continue with the body:

β€” Body :

Round 1 :

Crochet 7 sc on the right leg; make 3 chains; 18 sc on the left leg; 3 sc on the chain; 18 sc on the right leg ; 3 sc on the chain; put the marker here ( 42 )

Round 2 :

(6 sc, inc ) * 6 ( 48 )

Round 3-6 :

48 sc (4 rounds). Change the yarn to pink color:

Round 7 :

48 sc

Round 8 :

back loops only: 48 sc

Round 9 :

( 6 sc, dec ) * 6 ( 42 )

Round 10-11 :

42 sc ( 2 rounds )

Round 12 :

( 5 sc, dec ) * 6 ( 36 ).

Round 13-14 :

36 sc ( 2 rounds )

Round 15 :

( 4 sc, dec ) * 6 ( 30 )

Round 16-17 :

30 sc ( 2 rounds )

Round 18 :

( 3 sc, dec ) * 6 ( 24 ).

Round 19 :

24 sc

Round 20 :

( 6 sc, dec ) * 3 ( 21 )

Info :

Stuff the body firmly, especially in the neck. Cut the pink yarn, we will continue with the head, but first, we need to make the dress.

β€” Skirt :

Info :

Attach the pink yarn to the back of the body in the front loops of round 8.

Info :

Crochet with the body turned upside down:

Round 1 :

( 2 dc in one stitch ) * 48 ( 96 )

Round 2 :

96 dc Fasten off, and cut the yarn. Hide the thread inside the body.

β€” Head :

Info :

Change the yarn to white color. Stuff as you go.

Round 1 :

21 sc

Round 2 :

21 inc ( 42 )

Round 3 :

( 6 sc, inc ) * 6 ( 48 )

Round 4 :

( 7 sc, inc ) * 6 ( 54 )

Round 5-9 :

54 sc ( 5 rounds ) Insert the safety eyes between rounds 8 and 9 with 8 st between them.

Round 10 :

( 7 sc, dec ) * 6 ( 48 )

Round 11-13 :

48 sc ( 3 rounds )

Round 14 :

( 6 sc, dec ) * 6 ( 42 )

Round 15 :

15.42 Sc

Round 16 :

( 5 sc, dec ) * 6 ( 36 ) ( 30 )

Round 17 :

( 4 sc, dec ) * 6

Round 18 :

( 3 sc, dec ) * 6 ( 24 )

Round 19 :

( 2 sc, dec ) * 6 ( 18 )

Round 20 :

( sc, dec ) * 6 ( 12 )

Round 21 :

6 Dec ( 6 ) Make sure that the head is stuffed firmly. Close the opening and hide the yarn inside. Head sculpting

β€” Ears :

Info :

Crochet with white yarn .

Round 1 :

6 sc into a magic ring ( 6 )

Round 2 :

6 inc ( 12 )

Round 3 :

( sc , inc ) * 6 ( 18 )

Round 4 :

( 2 sc , inc ) * 6 ( 24 )

Round 5-6 :

24 sc ( 2 rounds )

Round 7 :

( 6 sc , dec ) * 3 ( 21 )

Round 8 :

( 5 sc , dec ) * 3 ( 18 )

Round 9 :

( 4 sc , dec ) * 3 ( 15 )

Round 10-12 :

15 sc ( 3 rounds ) Fasten off and cut the yarn , leaving a tail for sewing.

Info :

Fold the ear in half and sew the ends together. Sew the ears on the top of the head with 4 stitches between them.

Assembly Instructions

  • Fold each arm in half and crochet 5 sc through both sides to close the opening, then fasten off leaving a tail; sew the arms two rounds under the beginning of the head.
  • Attach the right and left legs to form the body by crocheting the connecting chains and rounds as instructed, placing a marker at the join (Round 1 of Body) to track the start.
  • Attach the pink yarn to the back of the body in the front loops of round 8 and work the skirt rounds with the body turned upside down; fasten off and hide the thread inside the body.
  • Insert safety eyes between rounds 8 and 9 of the head with 8 stitches between them, secure backs, and hide any tails inside before final stuffing.
  • Fold each ear in half and sew the ends together, then sew the ears on the top of the head with 4 stitches between them for even spacing.
  • After head shaping and closing (Round 21), close the opening securely, hide yarn tails inside, and sculpt the head using the white thread as directed for the muzzle and shaping.

Important Notes

  • πŸ’‘Insert safety eyes between rounds 8 and 9 with 8 stitches between them for correct facial placement.
  • πŸ’‘Stuff the body and head firmly, especially in the neck area, to ensure the toy keeps its shape during assembly.
  • πŸ’‘When making the skirt, work into the front loops of round 8 and crochet with the body turned upside down for proper ruffle placement.
  • πŸ’‘Use stitch markers to mark the beginning of rounds and the join between legs and body to avoid losing your place.

This charming Lily Bunny makes a delightful handmade gift and a cozy companion for any nursery or shelf. The chenille yarn and ruffled skirt add extra softness and personality to every stitch. Make one in your favorite colors and share the love with someone special. πŸ§ΆπŸ°πŸ’•

You ask,

we answer.

FAQs

What size will the finished piece be?

The finished amigurumi is approximately 35 cm tall when using the recommended chenille sport yarn and a 5 mm hook.

Can I use different yarn weights for this pattern?

Yes, you can use different yarn weights but this will change the final size; choose an appropriate hook for your yarn and adjust stuffing accordingly.

Do I need prior crochet experience for this pattern?

This pattern is rated intermediate (easy to medium), so basic knowledge of single crochet, increases, decreases, and working in rounds is recommended.

How long does this project typically take to complete?

Most crocheters finish Lily Bunny in about 5-7 hours, depending on experience, assembly speed, and customization choices.

Where should I place the safety eyes?

Place the safety eyes between rounds 8 and 9 of the head with eight stitches between the eyes as stated in the pattern for accurate facial placement.