About This By Your Side Basket Bag Pattern
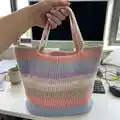
This pattern teaches you how to crochet a roomy, striped basket-style tote using Paintbox Recycled Crafty Pots yarn. It features a reinforced oval base, worked in joined rounds, and simple shaping to create comfortable handles. The bag is perfect for everyday use and showcases colourful self-striping yarn beautifully. Detailed round-by-round instructions make it easy to follow even with modest experience.

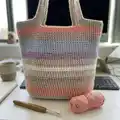
Youll work in the round to create a strong base, then build the sides and form handles with chain spaces. Finish by weaving in ends and blocking for a polished shape. The pattern includes gauge, abbreviations and helpful notes for a smooth make.
Why You'll Love This By Your Side Basket Bag Pattern
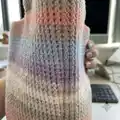
I absolutely love this pattern because it combines practicality with gorgeous colour transitions from self-striping yarn. I enjoy how quickly the base grows into a full bag — you can see progress every round, which is incredibly satisfying. The handle construction is clever and sturdy, making the finished bag comfortable to carry. I also appreciate that the pattern uses accessible stitches so I can recommend it to friends who want to level up their crochet skills.
Switch Things Up
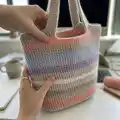
I love changing up the colour scheme to make each bag unique; try bold block stripes, tonal ombre, or two contrasting solids for a modern look.
I often use a bulkier yarn and a larger hook to create a sturdier, chunkier tote that works well for heavier loads.
To make a smaller version for a child or a mini market bag, choose a finer yarn and smaller hook and reduce the number of rounds worked for the base and sides.
I sometimes line the bag with fabric to increase durability and prevent small items slipping through; a simple cotton lining sewn in place works beautifully.
For added structure, insert a thin piece of interfacing or a recycled rubber mat into the base before finishing the lining.
I also like to embellish with embroidered initials, tassels, or a small pocket sewn inside for keys and phone—little extras make it personal.
If you want shoulder-length handles instead of shorter hand straps, extend the chain length for the handle openings and check the fit before securing the join.
I recommend experimenting with button or toggle closures at the top if you need a more secure bag; three small buttons or a single magnetic snap both work well.
To create a more rigid basket effect, try working the first few rounds in a tighter tension or using a hook one size smaller for the base only, then switch back for sides.
Dont be afraid to mix yarn brands or textures for a playful result—just swatch first to ensure the gauge and drape remain balanced.
Common Mistakes & How to Fix Them
✗ Not using stitch markers when working increases can make it hard to keep track of seam and marker positions; place and move markers as instructed each round to maintain correct shaping.
✗ Skipping the centre marker in the three-st increase section will distort the base shape; be sure to place the marker in the second of the three sts and move it as directed.
✗ Working with inconsistent tension will alter final size and stitch counts; check your gauge and maintain even tension throughout for the best result.
✗ Forgetting to remove or reposition markers when instructed can cause extra or missed stitches; always follow the instruction to remove markers as you work the handle joins.
✗ Not blocking the finished bag can leave it misshapen and floppy; weave in ends and block the bag to shape so it sits and drapes correctly.