🧢 Beautiful ✨ Detailed πŸ’ Adorable

Bunny Baby Rattle with Teether Ring Amigurumi Pattern

Bunny Baby Rattle with Teether Ring Amigurumi Pattern
4.8β˜… Rating
2-3 Hours Time Needed
1.6K Made This
βœ‚οΈ

Beginner Friendly Level

Perfect for those just starting their crochet journey, with clear instructions and simple techniques

⏱️

Bite-Sized Project

Finishes in 2-4 hoursβ€”perfect for an afternoon of creative relaxation.

🎁

Tiny Treasure

Small, sweet, and gift-worthy creations that fit perfectly in the palm of your hand with detailed charm.

About This Bunny Baby Rattle with Teether Ring Amigurumi Pattern

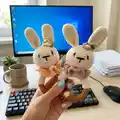
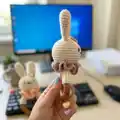
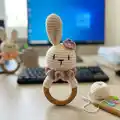
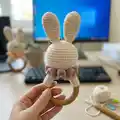
This pattern shows you how to crochet a charming bunny baby rattle with a wooden teether ring and an internal rattle ball. It includes step-by-step rounds for head, ears, body wrap for the ring, collar and a decorative flower. The design is compact and perfect for little hands, combining wood and soft yarn for sensory play.

Bunny Baby Rattle with Teether Ring Amigurumi Pattern crochet pattern - detailed view of completed project

Clear photos and QR-linked video tutorials accompany the pattern for visual guidance. You can customize the colors and small details to create a unique handmade gift.

Why You'll Love This Bunny Baby Rattle with Teether Ring Amigurumi Pattern

I absolutely love this pattern because it combines tactile elements β€” a wooden ring and a soft crocheted head β€” to make a toy that babies truly enjoy. I designed it to be compact and easy to hold, so it becomes an instant favorite for small hands. The rattle insert gives it delightful sound and the little flower and collar let you personalize each bunny. It’s satisfying to make and perfect for gifting or selling at craft fairs.

Bunny Baby Rattle with Teether Ring Amigurumi Pattern step 1 - construction progress Bunny Baby Rattle with Teether Ring Amigurumi Pattern step 2 - assembly progress Bunny Baby Rattle with Teether Ring Amigurumi Pattern step 3 - details and accessories Bunny Baby Rattle with Teether Ring Amigurumi Pattern step 4 - final assembly and finishing

Switch Things Up

I love to change up the colors to give each bunny a unique personality; try pastel tones for a soft baby look or bright colors for playful charm.

I often make a larger version by using a thicker yarn and a larger hook to create a cuddly, chunky rattle instead of a teether-sized one.

I sometimes swap the wooden ring for a smooth silicone teething ring for a fully baby-safe teether option β€” just ensure materials are baby-safe and securely attached.

I like to embroider different facial expressions; moving the eyes slightly closer or farther from the nose gives each bunny its own character.

I add tiny crocheted bows or buttons (sewn on very securely) to customize gifts for occasions like baby showers or newborn photoshoots.

I enjoy making sets in coordinating colors β€” matching booties or a small lovey complements the rattle beautifully for a gift set.

I sometimes change the collar design: make it longer, double-layered, or add a scalloped edge for a fancier look.

I recommend experimenting with cotton yarn for a more teether-friendly texture because cotton is durable and washes well compared to acrylic blends.

I suggest trying embroidering with a slightly fuzzy yarn for a cozy, soft muzzle effect, but be mindful of durability for baby use.

I occasionally replace the internal rattle with a sewn-in crinkle fabric insert for a variety of sounds and sensory stimulation.

Common Mistakes & How to Fix Them

βœ— Skipping the tight gauge can make the stuffing show through and the rattle move; use the recommended hook and check the gauge of 24 sts and 25 rows = 4" (10cm) to match the sample. βœ— Not securing the rattle ball inside properly may allow it to shift or fall out; stuff the head firmly and make sure to place and sew around the rattle ball before closing. βœ— Leaving long loose stitches when wrapping the wooden ring will create gaps and an untidy finish; cut the body wrap with a long tail and sew the edges tightly along the ring for a neat fit. βœ— Sewing ears asymmetrically results in an uneven look; fold each ear lengthwise to form a dimple and place them between rounds 4 and 5, using pins to check symmetry before stitching. βœ— Using fragile or unsafe embellishments for babies can be hazardous; sew all pieces tightly, avoid small loose parts, and choose baby-safe materials for teething toys.

Bunny Baby Rattle with Teether Ring Amigurumi Pattern

Make a sweet crochet bunny rattle with a wooden teether ring β€” perfect for gifting or baby playtime. This pattern guides you step-by-step through crocheting the head, ears, body wrap for the ring, collar and a tiny flower for decoration. You'll love how the wooden ring and internal rattle combine natural texture with soft yarn for tactile development.

Beginner Friendly 2-3 Hours

Materials Needed for Bunny Baby Rattle with Teether Ring Amigurumi Pattern

β€” Main Fabric

  • 01
    YarnArt Jeans (color 05) approx. 90 yards (main color)
  • 02
    YarnArt Jeans (any color for decoration) approx. 5 yards
  • 03
    Suggested yarn: Sport/Baby weight (2 - Fine), suitable for 2.00 mm hook

β€” Tools Required

  • 01
    Crochet hook size 2.00 mm
  • 02
    Wooden ring 6 cm / 2.5" diameter
  • 03
    Rattle ball 24 mm / 1"
  • 04
    Polyester fiberfill for stuffing
  • 05
    Sewing needle and pins
  • 06
    Scissors
  • 07
    Yarn needle for weaving in ends
  • 08
    Stitch markers (optional)

Progress Tracker

0% Complete

β€” Head :

Info :

Crochet by spiral.

Round 1 :

6 sc in Magic ring [fig 1] (6)

Round 2 :

6 inc (12)

Round 3 :

(1 sc, inc) * 6 (18)

Round 4 :

(2 sc, inc) * 6 (24)

Round 5 :

(3 sc, inc) * 6 (30)

Round 6 :

(4 sc, inc) *6 [fig 2] (36)

Round 7 :

(5 sc, inc) * 6 (42)

Round 8 :

(6 sc, inc) * 6 (48)

Round 9-15 :

48 sc [fig 3]

Round 16 :

(6 sc, dec) * 6 (42)

Round 17 :

(5 sc, dec) * 6 (36)

Round 18 :

(4 sc, dec) * 6 (30)

Round 19 :

(3 sc, dec) * 6 (24)

Info :

Stuff the head firmly and insert the rattle ball [fig 4]

Round 20 :

(2 sc, dec) * 6 (18)

Round 21 :

(1 sc, dec) * 6 (12)

Round 22 :

(sc) * 6 (6)

Info :

Cut the yarn with long tail [fig 5].

β€” Ears :

Info :

Make 2. Crochet by spiral.

Round 1 :

6 sc in Magic ring (6)

Round 2 :

6 inc (12)

Round 3 :

(2 sc, inc) * 4 (16)

Rounds 4-11 :

16 sc

Round 12 :

(6 sc, dec) * 2 (14)

Round 13 :

14 sc

Round 14 :

(4 sc, dec) * 2 (12)

Round 15 :

12 sc

Round 16 :

(4 sc, dec) * 2 (10)

Info :

Cut the yarn with long tail approx. 15 cm /6" [fig 6]. Make the second ear.

β€” Body :

Info :

Working in rows. Start with foundation chain.

Info :

NOTE that you may need to increase or decrease the number of rows to match your wooden ring. It should `hug` wooden ring completely.

Info :

Chain 25.

Row 1-9 :

24 sc, ch 1 and turn [fig 7]

Info :

Cut the yarn leaving a long tail for sewing. Wrap the ring and sew along [fig 8]

β€” Collar :

Info :

Working in rows. Using brown yarn.

Info :

Chain 20

Row 1 :

ch 2, 1 dc in the 20th ch, *2 dc in the next st* till the end, turn [fig 9]

Row 2 :

ch 2, *2 dc in the next st* till the end.

Info :

Cut the yarn leaving a long tail for sewing [fig 10]

β€” Assembling :

Item 1 :

Attach the head to the middle of the body. And sew it, firmly as you can, so it doesn’t move when shaking [fig 11]

Item 2 :

Fold the ears in half lengthwise so that a dimple forms at the base. Sew the ears between round 4 and 5. Use the sewing pins to place and fixate the ears. [fig 12]

Item 3 :

Place the collar between the body and head and sew the ends together into a ring. To prevent it from dangling, sew it to the head in several places [fig 13,14].

Item 4 :

Take black yarn and embroider the nose and eyes. Please, refer to the pictures! [fig 15]

Info :

Between the 11th and 12th rows embroider the horizontal line of the nose (the width of the nose is about 4 sc). From the middle down, embroider the nose with a vertical line in 2 rows. Embroider the eyes at a distance of 2 sc in the direction of the horizontal line of the nose. Make sure the muzzle is symmetrical ☺

β€” Flower :

Info :

Add some personality to your toy. Complete it with a bow or decorate it with a flower.

Info :

Chain 10 [fig 17].

Row 1 :

ch 1, 4 sc in one ch, sl-st, 4 hdc in one ch, sl-st, 4 dc in one ch, sl-st, change color of the yarn: (1 hdc, 2 dc, 2 trc, 2 dc, 1 hdc) in one ch, sl-st, (1 hdc, 2 dc, 2 tr, 2 dc, 1 hdc) in one ch.

Info :

Cut the yarn. Roll up and give the shape of a flower [fig 18-19]. Sew tightly.

Assembly Instructions

  • Attach the head to the middle of the body and sew it firmly so it does not move when shaking (see fig 11).
  • Fold each ear in half lengthwise to form a dimple and sew the ears between rounds 4 and 5, using sewing pins to place and fixate them (see fig 12).
  • Wrap the wooden ring with the body piece, sew the edges together and close the wrap around the ring; then sew the ends together into a ring and secure the collar and body to the head in several places to prevent dangling (see figs 8,13,14).
  • Place the collar between the body and head, sew the ends together into a ring and attach it to the head in several places to secure it (see figs 13,14).
  • Embroider the nose and eyes using black yarn between the 11th and 12th rows for the nose line (about 4 sc wide) then a vertical line downwards over 2 rows; place eyes 2 sc away from the nose horizontal line for symmetry (see fig 15).

Important Notes

  • πŸ’‘Use the recommended hook size and check gauge (24 sts and 25 rows = 4"/10cm in sc) to ensure the finished size matches the pattern.
  • πŸ’‘Stuff the head firmly but evenly and insert the rattle ball before closing to ensure proper sound and shape.
  • πŸ’‘Sew all pieces tightly and securely because this toy will be handled by a baby; avoid small loose parts and do not leave toys unattended in the crib.
  • πŸ’‘Pin parts in place and check symmetry before sewing to achieve an even, professional finish.

This adorable Bunny Baby Rattle pattern brings together soft yarn and a natural wooden teether ring for sensory play and soothing teething relief. Make one for a baby shower, a special handmade gift, or a sweet keepsake that lasts. Sew every piece tightly and enjoy crafting this tiny treasure for little hands. 🧢🧸

You ask,

we answer.

FAQs

What size will the finished piece be?

The rattle diameter will be approximately 2 1/2" (6 cm) and the height with the ring about 5 1/2" (14 cm) when using similar materials and hook size.

Can I use different yarn weights for this pattern?

Yes, you can change yarn weight, but this will affect the final size and the fit on the wooden ring; adjust your hook size and number of rows to match the ring if needed.

Do I need prior crochet experience for this pattern?

This pattern is rated beginner-friendly (advanced beginner) and requires basic crochet skills like single crochet, increases and decreases; photo and video references are provided to help.

How long does this project typically take to complete?

Most crafters finish this project in 2-3 hours, depending on experience and how much time you spend on finishing and sewing.

Is this toy safe for babies?

When made according to instructions using securely sewn parts and a properly enclosed rattle, this toy is designed for babies; always supervise infants and do not leave toys unattended in the crib.