— Body :
— Back (Yarn A) :
Round 1 :
14 loops, turning, 13sc (starting from the 2nd loop from the hook) (13l)
Round 2 :
1 loop, turning, 13sc (13l)
Round 3 :
1 loop, turning, inc, 11sc, inc (15l)
Round 4 :
1 loop, turning, 15sc only through front loops (15l)
Round 5 :
1 loop, turning, inc, 13sc, inc (17l)
Round 6 :
1 loop, turning, 17sc (17l)
Round 7 :
1 loop, turning, inc, 15sc, inc (19l)
Round 8 :
1 loop, turning, 19sc only through front loops (19l)
Rounds 9-11 :
1 loop, turning, 19sc (19l)
Round 12 :
1 loop, turning, 19sc only through front loops (19l)
Round 13 :
1 loop, turning, 19sc (19l)
Round 14 :
1 loop, turning, dec, 15sc, dec (17l)
Round 15 :
1 loop, turning, 17sc (17l)
Round 16 :
1 loop, turning, 17sc only through front loops (17l)
Round 17 :
1 loop, turning, dec, 13sc, dec (15l)
Round 18 :
1 loop, turning, dec, 11sc, dec (13l)
Round 19 :
1 loop, turning, dec, 9sc, dec (11l)
Round 20 :
1 loop, turning, dec, 7sc, dec only through front loops (9l)
Round 21 :
1 loop, turning, dec, 5sc, dec (7l)
Round 22 :
1 loop, turning, dec, 3sc, dec (5l)
Info :
Connect the back with the tail in the next round.
Info :
To connect the details insert the hook initially into the tail (from the inside to the outside), and then into the back (from the outside to the inside) (see photos 52-55).
Round 23 :
1 loop, turning, crochet 5sc of the back together with 5sc of the tail (see photo 56)
Info :
Next change the color to yarn B. To get a beautiful line when changing color in the next row (the same way as for the head) crochet part of the sc in this way - half of the sc with dark-brown (yarn A), and the other half with light-brown (yarn B).
Info :
Crochet the body around the perimeter in a counter-clockwise direction from the point "Start" (see photo 57).
Round 24 :
crochet 22sc, 13sc, 22sc on the back; crochet 13sc on the tail (70l) (see photos 58, 59)
Info :
Sew the holes between the tail and the back using extra thread (see photo 60).
Round 28 :
[5sc, dec]x10 (60l)
Round 29 :
[8sc, dec]x6 (54l)
Round 1 :
5 loops, turning, 4sc (starting from the 2nd loop from the hook) (4l)
Round 2 :
1 loop, turning, inc, 2sc, inc (6l)
Round 3 :
1 loop, turning, inc, 4sc, inc (8l)
Round 4 :
1 loop, turning, inc, 6sc, inc (10l)
Info :
Crochet the neck around the perimeter in a counter-clockwise direction from the point "Start" (see photo 61).
Round 10 :
8sc down; 4sc straight; 8sc up, 10sc straight (30l)
Info :
Mark with a pin the place where the neck connect to the body - move the pin for 1 loop right from the beginning of the round (see photo 62). Cut and fix the thread.
Info :
Continue crochet the body, change the thread to yarn C.
Info :
Connect the body with the neck in the next round.
Info :
To connect the details insert the hook initially into the neck (from the inside to the outside), and then into the body (from the outside to the inside) (see photos 63-67).
Round 30 :
crochet 9sc, dec, 7sc along the body; crochet 10sc of the body together with 10sc of the neck; then crochet 2sc, dec, [9sc, dec]x2 along the body (see photo 68) (60l)
Rounds 31-33 :
60sc (60l) (see photo 69)
Info :
Insert cotter pin between 6 and 7 row of the neck (in the middle, see photos 70, 71). Put the disk on cotter pin and wrap the ends in the "rings" with the help of round-nosed pliers (see photos 72-75).
Round 34 :
[3sc, dec]x12 (48l)
Round 35 :
[2sc, dec.]x12 (36l)
Info :
Start stuffing the body with synthepus.
Round 36 :
[sc, dec.]x12 (24l)
Round 37 :
[2sc, dec.]x6 (18l)
Round 38 :
[sc, dec.]x6 (12l)
Info :
Completely fill the body.
— Plates (Yarn C) :
Info :
Crochet plates with a hook 1,5 mm, split Yarn C in half!
SMALL, 8 pcs Round 1 :
2 loops, 4sc in 2nd loop from hook (amigurumi ring) (4l)
Round 2 :
[sc, inc]x2 (6l)
Info :
Cut and fix the thread, leaving a long end for sewing.
MIDDLE, 10 pcs Round 1 :
2 loops, 6sc in 2nd loop from hook (amigurumi ring) (6l)
Round 2 :
[2sc, inc]x2 (8l)
Round 4 :
[3sc, inc]x2 (10l)
Info :
Cut and fix the thread, leaving a long end for sewing.
BIG, 4 pcs Round 1 :
2 loops, 6sc in 2nd loop from hook (amigurumi ring) (6l)
Round 2 :
[sc, inc]x3 (9l)
Round 3 :
[2sc, inc]x3 (12l)
Info :
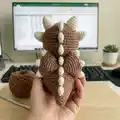
Slightly stuff the plates with synthepus. Cut and fix the thread, leaving a long end for sewing (see photo 79). Sew the plates to the back, placing them on the lines of the remaining back loops in a checkerboard pattern as shown on photos 80, 81.
— Legs (Yarn B) :
FRONT, 2 pcs Round 1 :
5 loops, turning, 4sc (starting from the 2nd loop from the hook), 4sc (from the back of the chain) (8l)
Round 2 :
3sc in the next loop, 6sc, 3sc in the next loop (12l)
Round 3 :
only through back loops 12sc (12l)
Rounds 4-5 :
[inc]x2, 3sc, {sc3tog}*, 4sc (12l)
Info :
*{sc3tog} – sc next 3 stitches together (single crochet decrease, see photo 82-84).
Round 6 :
[dec]x2, 3sc, [inc]x2, 3sc (12l)
Info :
Start stuffing the leg with synthepus.
Round 8 :
[dec]x2, 3sc, [inc]x2, 3sc (12l)
Round 15 :
[sc, dec]x4 (8l)
Info :
Completely fill the leg.
BACK, 2 pcs Round 1 :
5 loops, turning, 4sc (starting from the 2nd loop from the hook), 4sc (from the back of the chain) (8l)
Round 2 :
3sc in the next loop, 6sc, 3sc in the next loop (12l)
Round 3 :
only through back loops 12sc (12l)
Rounds 4-5 :
[inc]x2, 3sc, {sc3tog}*, 4sc (12l)
Round 6 :
[dec]x2, 3sc, [inc]x2, 3sc (12l)
Info :
Start stuffing the leg with synthepus.
Round 8 :
[dec]x2, 3sc, [inc]x2, 3sc (12l)
Round 13 :
[sc, dec]x4 (8l)
Round 14 :
[2sc, dec]x2 (6l)
Info :
Trim the thread. Pass the thread through all the loops using a yarn needle. Tighten and secure.
— Thoes (Yarn C, in two folds) :
Info :
THOES, 3 pcs on each leg. Embroider 3 toes on each leg with French knot (see photos 85-90).
— Assemblage :
Info :
Sew your crocheted legs to the body with a threaded bracing (use round-nosed pliers to make it easier to pull the needle). For this, it is necessary:
Step 1 :
Attach the legs using needles for cutting (front legs between 29 and 30 rounds of body, distance between legs approx 24 stitches, back legs between 25 and 26 rounds of body, distance between legs approx 16 stitches - view from above, see photos 91-93). Check that the dinosaur stand steadily. Detach the arms and legs without removing the needles from them, and insert other needles for cutting in their place (see photo 94, 95).
Step 2 :
Insert the needle through the back into the front leg attachment point (leaving the loose end of the thread outside) (see photo 96, 97).
Step 3 :
Thread the needle through two loops on the inner surface of the leg (the needle for cutting must be in the middle) (see photo 98).
Step 4 :
Insert the needle into the body at the leg attachment point and pull out it at the point of attachment of the second leg (see photo 99).
Info :
Continue sewing following the assembly photos and instructions until all parts are securely attached and holes are closed.
Assembly Instructions
- Attach the head to the body using the cotter pin and shim: insert the cotter pin between rounds 31 and 32 of the head and secure with the disk inside the body before final closing.
- Position the front legs between rounds 29 and 30 of the body (approx 24 stitches apart), and the back legs between rounds 25 and 26 (approx 16 stitches apart). Pin parts, check balance, and sew with braced threaded stitches.
- Sew plates and spikes to the back in a checkerboard pattern: place big, middle and small plates following photos for even spacing and stitch securely with long sewing tails.
- Attach the tail to the marked point on the back (move the pin to the 12th loop from the beginning of the tail round) and sew, closing holes between tail and back with extra thread.
Important Notes
- 💡Use stitch markers to keep track of rounds and the start of rows; this is especially important when changing colors and joining parts.
- 💡Stuff the neck very tightly so the dinosaur holds its head well, and add a felt disk if needed to keep synthepus from sticking to the cotter pin.
- 💡When changing colors, crochet half of the sc with the old color and finish the other half with the new color to obtain a neat color join line.
- 💡If you decide to add wire to the tail, wrap wire joins with electrical tape and check safety; wire is optional and not safe for toys for very young children.
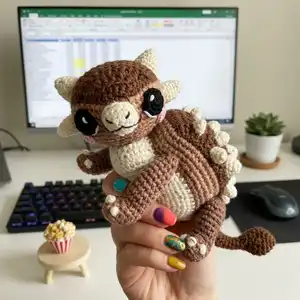
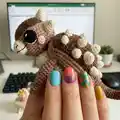
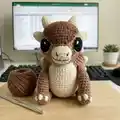
This chubby Ankylosaurus Bruno pattern is a delightful blend of character and craft that makes a perfect handmade gift. With tiny plates, spikes and an expressive face, Bruno becomes a lovable companion on any shelf or desk. Follow the step-by-step photos and notes to create your own Bruno and enjoy every stitch. 🧶🧵✨
What size will the finished piece be?
The finished amigurumi measures approximately 7 cm (2.8 inches) high and 12 cm (4.7 inches) in length without the tail using the recommended yarn and hooks.
Can I make Bruno without the wire in the tail?
Yes, the wire is optional. If you dont want the tail to be posable, simply stuff it fully with synthepus and omit the wire assembly steps.
What hook sizes are required for this pattern?
You will need a 1.75 mm hook for the main dinosaur construction and a 1.5 mm hook for small details like cheeks, spikes and plates.
Do I need advanced skills to make this?
This pattern is rated intermediate because it includes shaping, joining parts, and optional hardware (cotter pin and wire). Basic amigurumi experience and familiarity with increases, decreases and sewing pieces is recommended.
Stay in the Loop!
Get notified when we release new free crochet patterns and join our crafting community!