🧶 Beautiful ✨ Detailed 💝 Adorable

Little Frog Amigurumi Pattern

Little Frog Amigurumi Pattern
4.6★ Rating
2-4 Hours Time Needed
4.0K Made This
✂️

Intermediate Level

Ideal for those with basic crochet experience, featuring slightly more advanced stitches and techniques to expand your skills.

⏱️

Bite-Sized Project

Finishes in 2-4 hours—perfect for an afternoon of creative relaxation.

🧸

Cute Companion

An adorable friend to cherish, handcrafted with love to bring comfort and joy for years to come.

About This Little Frog Amigurumi Pattern

This pattern creates a small, cuddly little frog using 100% cotton DK yarn and a 2.0 mm hook. You will crochet the belly, back, eyes, eyelids, paws and tongue, then sew and decorate the finished toy. The design features puff stitches for the toes and embroidered french knots for back details.

Little Frog Amigurumi Pattern crochet pattern - detailed view of completed project

Clear step-by-step rounds and photo references guide you through assembly and finishing. The finished frog measures approximately 7 cm when using the recommended materials.

Why You'll Love This Little Frog Amigurumi Pattern

I absolutely love this pattern because it turns simple crochet rounds into a charming little character with lots of personality. I enjoy the small, satisfying pieces—especially the eyes and puff-stitch toes—which make the frog so expressive. The assembly is rewarding and allows you to customize placement for different looks. It is a lovely project to practice shaping, sewing, and small-detail work while still finishing in a short time.

Little Frog Amigurumi Pattern step 1 - construction progress Little Frog Amigurumi Pattern step 2 - assembly progress Little Frog Amigurumi Pattern step 3 - details and accessories Little Frog Amigurumi Pattern step 4 - final assembly and finishing

Switch Things Up

I love customizing this pattern by changing yarn colors to create a whole family of frogs, so I often make lime, mint and pastel versions for variety.

I sometimes use thicker cotton or sport yarn and a slightly larger hook to make a bigger, cuddlier frog that still keeps the same proportions.

For a keychain version I use thinner yarn and a 1.75 mm hook, shorten the assembly tails and add a split ring before finishing the top stitches.

I add different eye placements to change expressions—move the eyes closer together for a curious look or further apart for a friendlier face.

Try embroidered mouths or tiny felt tongues instead of crocheting the tongue to speed up assembly and add texture contrast.

I enjoy adding beads or small sequins to the back instead of french knots for a sparkly decorative option that catches the light.

If you want poseable legs, I sometimes insert thin craft wire in the limbs before final stuffing to allow a bit of shaping.

Mixing yarn textures can be charming—pair smooth cotton with a boucle or slightly fuzzy thread for a playful tactile effect.

I recommend experimenting with safety eye sizes; 6 mm gives a compact look, while 8 mm makes a cuter, more expressive gaze.

Don’t be afraid to change the puff stitch size for the toes—work more or fewer dc loops before joining to create chunkier or slimmer toes depending on your style.

Common Mistakes & How to Fix Them

✗ Crocheting with loose tension can create holes where stuffing shows through; use tighter tension or a smaller hook to avoid visible stuffing. ✗ Not stuffing gradually will make shaping difficult and lumpy; add stuffing little by little as you join the belly and back to maintain even shape. ✗ Skipping counting rounds during increases leads to incorrect stitch counts and distorted shaping; count after each increase round to ensure accuracy. ✗ Forgetting to leave long yarn tails when finishing pieces prevents easy sewing; always leave enough thread for sewing and hide ends when assembly is complete.

Little Frog Amigurumi Pattern

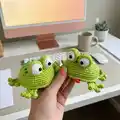
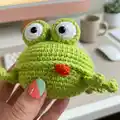
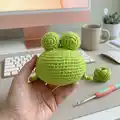
Make an adorable little frog amigurumi with this step-by-step crochet pattern. You will work small pieces like eyes, eyelids, paws and a cute tongue, then assemble them for a charming finish. The pattern uses simple rounds and clear photos to guide you through each step. Perfect for gifting or keeping as a playful handmade decoration.

Intermediate 2-4 Hours

Materials Needed for Little Frog Amigurumi Pattern

— Main Fabric

  • 01
    PaintBox Yarns Cotton DK (100% cotton), 125 m per 50 g skein: Lime Green (629) - main color (approx. 50 g)
  • 02
    PaintBox Yarns Cotton DK: Paper White (601) - white for belly and eyes (approx. 25 g)
  • 03
    Small amount of Pillar Red (615) for tongue (approx. 5 g)
  • 04
    Small amount of Spearmint Green (626) for embroidered back spots (small quantity)

— Tools Required

  • 01
    A hook 2.0 mm (I used Clover)
  • 02
    Stuffing (hollow fiber)
  • 03
    Safety eyes or black beads 6 mm in diameter
  • 04
    A needle with a big eye
  • 05
    Sewing pins

Progress Tracker

0% Complete

— Materials and tools :

Info :

Yarn 100% cotton for crocheting a frog. (I used PaintBox Yarns Cotton DK 125 m, 50 g: Lime Green (629),Paper White (601), small amount of Pillar Red (615) and Spearmint Green (626)); A hook 2.0 mm (I used Clover); Stuffing (hollow fiber); Safety eyes or black beads 6 mm in diameter; A needle with a big eye; Sewing pins.

Info :

The toy must be crocheted with tight stitches, to be sure that there won't be any holes through which stuffing material can be seen, if there are tiny holes, use a smaller size hook. Frog's size is approximately 7 cm ( 2.7 in), if you use the same material that I used.

Info :

ch- chain; sc- single crochet; dc - double crochet; puff stitch - crochet 4 dc in the same stitch and then join them together to finish the stitch; sl.st. - slip stitch; sc inc - increase; sc dec - decrease; (sc, inc)*n - repeat those in brackets n-times.

— Belly :

Info :

With white yarn. Use a hook 2.0 mm. The belly is crocheted in a spiral.

Round 1 :

1 row: 6 sc in magic ring (6)

Round 2 :

2 row: 2 sc in each sc (12)

Round 3 :

3 row: (1 sc, sc inc)* 6 (18)

Round 4 :

4 row: (2 sc, sc inc)* 6 (24)

Round 5 :

5 row: (3 sc, sc inc)* 6 (30)

Round 6 :

6 row: (4 sc, sc inc)* 6 (36)

Round 7 :

7 row: (5 sc, sc inc)* 6 (42)

Round 8 :

8 row: (6 sc, sc inc)* 6 (48)

Round 9 :

9 row: (7 sc, sc inc)* 6 (54)

Round 10 :

10 row: (8 sc, sc inc)* 6, sl.st (60)

Info :

Tie off the thread and cut it (pic. 1).

— Back :

Info :

With green yarn. Use a hook 2.0 mm. The back is crocheted in a spiral.

Round 1 :

1 row: 6 sc in magic ring (6)

Round 2 :

2 row: 2 sc in each sc (12)

Round 3 :

3 row: (1 sc, sc inc)* 6 (18)

Round 4 :

4 row: (2 sc, sc inc)* 6 (24)

Round 5 :

5 row: (3 sc, sc inc)* 6 (30)

Round 6 :

6 row: (4 sc, sc inc)* 6 (36)

Round 7 :

7 row: (5 sc, sc inc)* 6 (42)

Round 8 :

8 row: (6 sc, sc inc)* 6 (48)

Round 9 :

9 rows: 48 sc (48)

Round 10 :

10 row: (7 sc, sc inc)* 6 (54)

Round 11 :

11 rows: 54 sc (54)

Round 12 :

12 row: (8 sc, sc inc)* 6 (60)

Round 13-14 :

13-14 rows: 2 rows - 60 sc (60) (pic. 2)

Info :

Don't cut the work thread.

Info :

Join the belly and the back together: put the wrong sides of the pieces to each other, insert the crochet hook through the loops of the both pieces (pic. 3) and crochet sc. Work sc around the edge (pic. 4).

Info :

Stuff the body as you go round. (pic. 5).

Info :

Finish with sl.st. Tie off the thread and hide it inside. (pic. 6, 7)

— Eyes :

Info :

Eyes. 2 pcs With white yarn. Use a hook 2.0 mm. The eyes is crocheted in a spiral.

Round 1 :

1 row: 6 sc in magic ring (6)

Info :

Close the magic ring, but not too tight that you can insert the safety eyes easily.

Round 2 :

2 row: 2 sc in each sc (12)

Round 3 :

3 row: (3 sc, sc inc)* 3 (15)

Round 4-5 :

4-5 rows: 2 rows - 15 sc (15)

Info :

Insert the safety eyes into the middle of the magic ring (pic. 8, 9)

Round 6 :

6 row: (3 sc, sc dec)* 3 (12)

Info :

Stuff the eye (pic. 10).

Round 7 :

7 row: 6 sc dec (6)

Info :

Finish with sl.st. Tie off the thread and leave enough for sewing. (pic. 11)

— Eyelids :

Info :

Eyelids. 2 pcs With green yarn. Use a hook 2.0 mm. The eyelids are crocheted in a spiral.

Round 1 :

1 row: 6 sc in magic ring (6)

Round 2 :

2 row: 2 sc in each sc (12)

Round 3 :

3 row: (1 sc, sc inc) *6 (18)

Round 4-6 :

4-6 rows: 3 rows - 18 sc (18)

Info :

Finish with sl.st. Tie off and leave enough thread for sewing (pic. 12, 13).

— Paws :

Info :

Paws. 4 pcs With green yarn. Use a hook 2.0 mm.

Round 1 :

1 row: 2 ch, 12 dc in magic ring, sl.st. (12) (pic. 14-16)

Round 2 :

2 row: 4 sl.st., (6 ch., puff stitch in the 3th loop from the hook and 1 sc in the 4th, 5th and 6th loops from the hook, 1 sl.st. in the next loop of the first row) * repeat this pattern two more times, 4 sl.st. (pic. 17-22)

Info :

Tie off the thread and leave enough for sewing.

— Tongue :

Info :

Tongue. With red yarn. Use a hook 2.0 mm. Crochet 4 ch

Round 1 :

1 row: start in the second loop from the hook (pic. 23) and crochet 2 sc, 3 sc in last ch, don't turn the work and crochet continuously in circle direction,1 sc, 1 sc inc (8) (pic. 24)

Info :

Finish with sl.st. Tie off the thread and leave enough for sewing.

— Assembly :

Place the eyes into the eyelids (P1) :

- Place the eyes into the eyelids and sew them. (pic. 25-28) Tie off the white yarn in the bottom of the eye. (pic. 29, 30).

Sew the eyes onto the head/body (P2) :

- Sew the eyes onto the head/body between the 4th and 8th rows (pic. 32-38).

Sew the front paws (P3) :

- Sew the front paws onto the bottom of the frog symmetrically to the muzzle. (pic. 39-44).

Sew the back paws (P4) :

- Sew the back paws onto the bottom of the frog (pic. 47-50). The back paws should be placed as on the pictures 45, 46.

Sew the tongue (P5) :

- Sew the tongue onto the muzzle (pic. 51, 52)

Decorate (P6) :

- Embroider french knots on the back of the frog using the dark green yarn (pic. 53-55). Note: Also you can use green beads for decorating.

Info :

Congratulations! Your little frog is ready! I wish you nice crocheting!

Assembly Instructions

  • Place the eyes into the eyelids and sew them securely (see pics 25-28), then tie off the white yarn at the bottom of each eye to secure it before trimming (pic. 29, 30).
  • Position and sew the eyes onto the head/body between the 4th and 8th rows so they sit level and symmetrical (refer to pics 32-38), using pins to hold placement while stitching.
  • Sew the front paws onto the bottom of the frog, placing them symmetrically to the muzzle and pinning before final sewing to ensure even spacing (pics 39-44).
  • Attach the back paws to the bottom of the frog following the placement in pictures 45 and 46, then sew them down securely (pics 47-50).
  • Sew the tongue onto the muzzle centered below the eyes (pics 51-52), and embroider french knots or attach beads on the back for decoration (pics 53-55).

Important Notes

  • 💡Use tight stitches to prevent stuffing from showing through; switch to a smaller hook if you see tiny holes appearing.
  • 💡Do not cut the work thread on the back piece until you have joined the belly and back and crocheted around the edge.
  • 💡Stuff the body gradually while joining the pieces so you can shape the frog evenly without overstuffing.

This little frog is a tiny bundle of handmade charm, perfect for gifts or shelf buddies. 🐸 Handcrafted details like puff-toe paws and french knot spots make each frog unique and full of personality. 🧶 Enjoy the calming rhythm of small rounds and satisfying assembly—happy crocheting! ✨

You ask,

we answer.

FAQs

What size will the finished piece be?

The finished amigurumi measures approximately 7 cm tall when using the recommended PaintBox Cotton DK yarn and a 2.0 mm hook.

Can I use different yarn weights for this pattern?

Yes, you can change yarn weight, but this will affect the final size; use an appropriate hook for your yarn and expect differences in proportions.

Do I need prior crochet experience for this pattern?

This pattern is rated intermediate and assumes basic knowledge of single crochet, increases, decreases, and working in spirals; familiarity with puff stitch is helpful.

How long does this project typically take to complete?

Most crocheters complete this frog in 2-4 hours depending on experience and assembly speed.