About This Lily Bunny Amigurumi Pattern
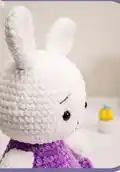
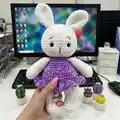
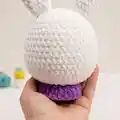
This pattern teaches you how to crochet a soft Lily Bunny using chenille sport yarn for a plush finish. You will work the head, body, arms, legs, ears, and a cute skirt with clear round-by-round instructions. The finished toy is approximately 35 cm tall when using the recommended materials and supplies.
Techniques include crocheting in the round, working increases and decreases, back loop stitches for the skirt edge, and simple embroidery for the face. The pattern uses US terminology and includes assembly tips for neat finishing.
Why You'll Love This Lily Bunny Amigurumi Pattern
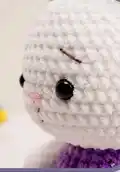
I absolutely love this pattern because it transforms simple stitches into a sweet, huggable character that feels luxurious thanks to chenille yarn. I love how the skirt adds personality and is worked directly onto the body for a seamless look. I enjoy the clear step-by-step rounds which make shaping predictable and satisfying. I also appreciate the small finishing details like head sculpting and embroidered features that give Lily Bunny so much charm.
Switch Things Up
I love experimenting with colorways, and you can easily change the skirt and body color to create seasonal or themed bunnies.
I often try pastel palettes for baby gifts and bright jewel tones for playful decor; the chenille texture makes every version feel soft and luxurious.
I sometimes swap chenille for a smooth worsted weight to make a lighter, more defined stitch look; adjust hook size accordingly to keep proportions similar.
I like adding small accessories like a crocheted bow, scarf, or tiny booties to personalize each bunny for birthdays or holidays.
I also recommend trying safety joints or a bit of wire in the limbs if you want posable arms for display pieces.
I have modified the skirt by adding more rounds of ruffles for an extra frilly look, which gives a fuller silhouette.
I also enjoy embroidering different facial expressions—move the eyes a stitch or two to make a sleepier or happier face.
I sometimes add a small pocket or applique to the dress to make a toy-with-a-purpose, like a tiny pocket for notes or a birthstone charm.
I encourage trying different eye sizes; smaller eyes make a cuter baby look while larger eyes give more character and presence.
I find blocking or lightly steaming chenille pieces (carefully) helps align the stitch rows and makes assembly easier for a neat final result.
Common Mistakes & How to Fix Them
✗ Skipping stitch markers during the body join can cause misaligned rounds and uneven shaping; use a marker at the start of the round and after joining to maintain stitch placement.
✗ Not stuffing as you go causes uneven limbs and lumps; stuff gradually during rounds and shape by adding small amounts of filling frequently.
✗ Cutting yarn too early for the right leg when it should continue to the body will leave you with a gap; follow the instruction to not cut the right leg yarn and continue crocheting for a smooth join.
✗ Forgetting to insert safety eyes at the recommended rounds results in misplacement; insert eyes between rounds 8 and 9 with eight stitches between them before continuing to close the head.
✗ Overtight tension when crocheting chenille can compress the stitches and make assembly difficult; maintain a relaxed, even tension so pieces sit together nicely.