About This Desert Crochet Cactus Amigurumi Pattern
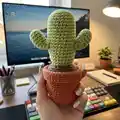
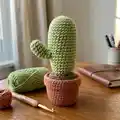
This pattern teaches you how to crochet a small desert cactus set in a miniature terracotta pot with a soil base and optional flowers. The design uses DK weight yarn and basic stitches to create a polished miniature plant that looks great on shelves or desks. You will learn simple shaping, a magic ring start, and how to assemble small amigurumi pieces into a finished display.

Includes separate instructions for the soil base, cactus body, arms, and optional flowers with step-by-step rounds. Clear abbreviations and notes are provided to keep the process smooth and beginner-friendly.
Why You'll Love This Desert Crochet Cactus Amigurumi Pattern
I absolutely love this pattern because it turns simple stitches into a delightful miniature plant that brightens any space. I enjoy how quickly the project comes together, making it perfect for a relaxed afternoon of crocheting. The small scale means you can make a whole collection of different cactus shapes and colors to display together. I also love that the assembly is straightforward, so you get a satisfying finished piece with minimal fuss.
Switch Things Up
I love to switch up the look by changing yarn colors; swapping the green for a deeper forest green or a soft mint gives each cactus a unique personality.
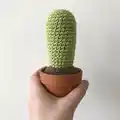
To make a chunkier cactus, I use a bulkier yarn with a correspondingly larger hook which dramatically increases the size and squishiness.
If I want a very small cactus for a keychain, I use finer yarn and a smaller hook to create a tiny, portable version.
I often add embroidery lines or tiny French knot spines for texture instead of leaving the surface plain.
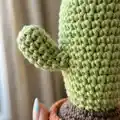
For the arms, I sometimes insert pipe cleaners for posability and then stitch them in place so the arms can be posed upwards, outwards, or hugging.
Try different flower colors and shapes for a seasonal look 6pastels for spring, bright shades for summer, or muted tones for a cozy autumn vibe.
You can also make a mixed display by varying pot sizes and yarn weights to create a charming cactus garden on your windowsill.
To create ribbed texture, experiment with working in the back loop only or using surface slip stitches to emphasize vertical ribs.
I sometimes add a little felt leaf or a tiny crocheted sign to personalize a cactus as a gift with a name or small message.
If you want a heavier base, glue a coin or a small washer into the bottom of the pot before adding the crocheted soil to help the cactus sit sturdily.
Common Mistakes & How to Fix Them
✗ Skipping the magic ring and substituting chains incorrectly; use a proper magic ring or the two-chain alternative described to avoid holes in the center.
✗ Understuffing the cactus causes it to collapse or lose shape; stuff firmly and evenly as you work to maintain a rounded silhouette and consistent tension.
✗ Forgetting to mark the first stitch of each round can lead to miscounts and missed increases; place a stitch marker at the start of each round and move it as you go.
✗ Not checking the soil circumference against the pot can result in a soil piece that is too small or too large; try the soil inside the pot and continue increasing until it sits just inside the pot as shown.