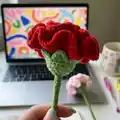
About This Carnation Flower Pattern
This pattern teaches you how to crochet a realistic carnation flower with a green base and a layered, ruffled flower head. It uses DK (size 3) yarn, a 3.5 mm hook, and simple stitches like single crochet and double crochet. The instructions are worked in the round and include working into back loops to attach the flower head.
You will learn how to create ruffled petals by crocheting multiple double crochets into each stitch for dramatic texture. Finish the flower by inserting a wire stem and wrapping with florist tape for a professional look.
Why You'll Love This Carnation Flower Pattern
I absolutely love this pattern because it creates a realistic, ruffled carnation with just a few simple techniques. I enjoy how quickly the flower takes shape — the petals bloom into life as you work the clustered double crochets. The pattern is compact and rewarding, perfect for creating small bouquets or gift stems. I also love how easy it is to customize the colors and size by changing yarn or hook, which keeps every finished flower unique.
Switch Things Up
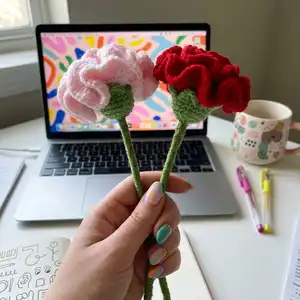
I love how easy this carnation is to customize; try different color combinations like two-toned petals or variegated yarn to create unique flowers.
You can make the flower larger by using aran or bulky weight yarn with a larger hook for a bold statement bloom.
To create mini versions for decorations or keychains, use fingering weight yarn and a smaller hook for delicate tiny carnations.
I sometimes add a small bead or French knot to the center for extra detail and a slightly different focal point.
If you want stiffer petals, try using a slightly tighter tension or a yarn with more structure like cotton blends for a crisp finish.
I often make a bouquet by varying petal colors and lengths; cluster three to five carnations together for an attractive arrangement.
Try crocheting fewer rounds of the petal expansion if you prefer a less ruffled, flatter bloom for a different look.
I recommend experimenting with felting or starching for decorative pieces that need extra firmness, testing on a scrap first.
Consider wrapping the stem with thin ribbon instead of florist tape for a decorative, gift-ready finish that coordinates with your yarn color.
I also like to combine these flowers with crocheted leaves or add wired leaves for a more realistic botanical arrangement and extra visual interest.
Common Mistakes & How to Fix Them
✗ Not marking the first stitch can make it hard to track rounds; place a stitch marker at the beginning of every round so you always know where the round starts.
✗ Crocheting too loosely will create gaps and floppy petals; maintain consistent, tight stitches and try a slightly smaller hook if your stitches are too loose.
✗ Forgetting to work into the back loops from R 3 will make it impossible to attach the flower head correctly; be sure to flip and access the back loops created in round 3 before attaching the flower color.
✗ Cutting the tail too short when fastening off will make sewing the pieces together difficult; leave a generous tail for sewing and shaping during assembly.
✗ Skipping the slip stitch join at the end of rounds can change your stitch count and shape; always slip stitch to the top of the first stitch to finish the round neatly.
✗ Overstuffing or adding too much tension when shaping the base can distort the flower; use gentle shaping stitches and secure with a few tidy stitches rather than pulling too tight.