About This Bonnie Beanie Pattern
This pattern creates a classic baby beanie in five sizes from 0–3 months up to 18–24 months using Paintbox Yarns Baby DK Prints. It is worked in continuous rounds with simple increases, finished with a turned ribbed brim worked in back loops only (BLO), and topped with a pom pom. The instructions show US terminology with UK equivalents given in round brackets for clarity.
The pattern includes sizing adjustments for each age, full round-by-round instructions, and clear finishing notes for joining and adding the brim. Ideal as a quick gifting project or to practice consistent tension and working in continuous rounds.
Why You'll Love This Bonnie Beanie Pattern
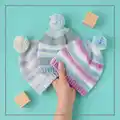
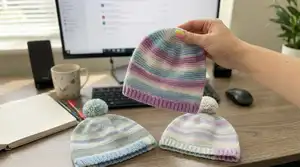
I absolutely love this pattern because it takes a classic beanie shape and makes it approachable for new crocheters. The continuous rounds and repeated increase pattern build confidence without overwhelming complexity. I enjoy how the BLO brim gives a neat ribbed finish that looks professional but is simple to make. The colorways suggested (Mermaid, Misty Forest, Pastel Party) create lovely soft stripes without extra color changes, which makes the project feel playful yet effortless. Sewing on the pom pom at the end is such a satisfying finishing touch that brings the whole hat together.
Switch Things Up
I love how easy it is to customize the Bonnie Beanie by switching colorways; try alternating solid DK yarn for bold stripes or tonal skeins for a subtler look.
I often change the brim by working more or fewer repeats of the 3rd and 4th rows to create a taller or shorter ribbed edge.
I sometimes add contrast edging by changing yarn for the last 2–4 rounds of the body before turning to the brim to give a neat pop of color.
To make a teen or adult size, I increase the number of increase rounds before moving to the straight rounds and check gauge as I go to hit the target circumference.
I also like replacing the pom pom with a crocheted flower or a cuffed fold-over brim for seasonal variations and different looks.
Using a bulkier DK or worsted weight yarn with a larger hook makes a chunkier version that works up quickly and is extra cozy for cold weather.
I sometimes add a soft fleece lining for extra warmth and to create a snug, comfortable fit for babies by sewing the lining into the inside of the hat before finishing.
For a playful twist, embroider simple facial features or add small appliques after completing the hat for character hats or themed gifts.
I recommend experimenting with placement and size of the pom pom; larger pom poms make a bold statement while tiny ones are cute for newborn hats.
Finally, I enjoy combining different stitch textures in the body—switching a few rounds to half double crochet or front loop-only rounds creates subtle banding and texture.
Common Mistakes & How to Fix Them
✗ Skipping the stitch marker when working continuous rounds leads to lost round starts; place a marker in the last stitch of the round and move it up every round to maintain the correct starting point.
✗ Not counting stitches after increases can lead to incorrect shaping and wrong final circumference; count your stitches at the end of each increase round to ensure you have the stated stitch total.
✗ Using inconsistent tension when switching hook sizes for brim and body causes uneven joins; maintain similar tension and practice a few rows to match gauge between body and brim hooks.
✗ Failing to work the brim at right angles to the body will misalign the ribbing; after ss at the end of the final body round, turn and work across the chain as instructed so the brim sits correctly.
✗ Cutting yarn ends too short when making a pom pom can cause it to come loose; leave a long tail to securely sew the pom pom into the centre of the magic ring and weave in ends well.