About This Bobby the Bighorn Sheep Amigurumi Pattern
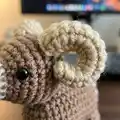
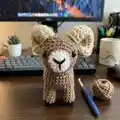
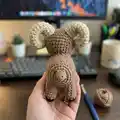
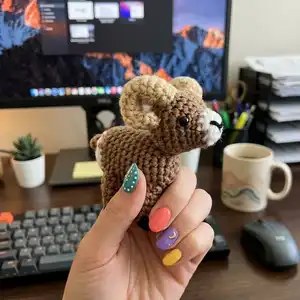
This pattern teaches you how to crochet a small, realistic bighorn sheep named Bobby, complete with curled horns and a textured body. You will work the head, body, legs, tail, and horns separately, then assemble them for a finished toy ready to display. Instructions are written in US terms with clear round-by-round counts to help you stay on track. Photos show placements and assembly steps to guide you through finishing touches.
The pattern uses worsted weight yarn and simple amigurumi techniques to create a sturdy, cute figure. Perfect for makers wanting to practice shaping, color changes, and small-piece assembly.
Why You'll Love This Bobby the Bighorn Sheep Amigurumi Pattern
I absolutely love this pattern because it captures a realistic bighorn look in a tiny, lovable amigurumi form. I enjoy how the curled horns add so much character while still being approachable to crochet. The step-by-step rounds and clear photo references make it satisfying to complete each piece and see Bobby come together. I also love that you can customize colors and add small details like embroidered nostrils or a weighted body to make each sheep unique.
Switch Things Up
I love how easy it is to customize Bobby by changing yarn colors; try white for an arctic look or grey for a mountain ram.
I often switch to a boucle or textured yarn for the body to create a fluffy, wool-like finish that adds realism and tactile interest.
If you want a larger version, I recommend using a bulkier yarn and a bigger hook; your sheep will grow proportionally with minimal pattern change.
To make a tiny keychain version, use fingering or sport weight yarn with a smaller hook and replace safety eyes with embroidered eyes for safety.
I sometimes add wire to the horns before closing to hold a dramatic curl; insert thin flexible wire and wrap with yarn for posable horns.
Try different eye styles—glass, plastic safety eyes, or embroidered eyes—to change the personality from realistic to cute and cartoony.
I like to embroider little eyebrows or freckles to enhance expression; small black or brown stitches can add so much character.
For stability, add a small penny or washer to the bottom of the body before final stuffing so your sheep stands sturdily on display.
Create a set of sheep in a range of sizes and colors to make a whole flock; display them together for a delightful gift set or shelf decor.
I also enjoy making tiny accessories like a crocheted scarf or bell collar to give Bobby a unique story and add a special finishing touch.
Common Mistakes & How to Fix Them
✗ Skipping the color change at the specified stitch can misplace the nose area; change colors on the last stitch exactly as instructed to keep the face placed correctly.
✗ Not placing safety eyes between the correct rounds will make the face look uneven; place eyes between rows 5 & 6 and space them 8 stitches apart for accurate expression.
✗ Understuffing or overstuffing the head and body will distort the shape; stuff gradually and firmly but not too tightly to maintain a smooth, natural form.
✗ Forgetting to add the penny for weight can make the sheep top-heavy; add a penny inside the body before closing to help the sheep stand upright.
✗ Sewing legs or horns in the wrong rows results in crooked limbs; pin pieces in place and reference the specified row ranges before stitching to ensure symmetry.