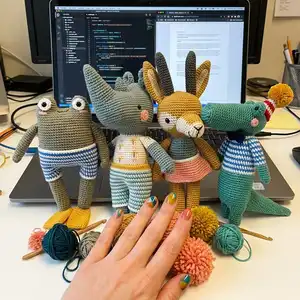
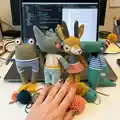
This collection introduces you to the charming world of Pica Pau amigurumi — handcrafted animal friends designed to inspire and delight. You will find clear guidance on tools, yarn choices, hook anatomy and essential stitches to get you started. The instructions focus on creating dense, well-shaped toys using smaller hooks for a professional finish and long-lasting results.
Progress Tracker
0% Complete
— Tools and Supplies :
Info :
One of the most interesting things about crochet is the fact that a hook and a strand of yarn are all you need to start working. If you have been crocheting for years, or have the incredible fortune of having someone who crochets in the family, it’s more than likely that you have in your possession a case filled with hooks and needles, in various sizes and from different origins. If you started recently, and you have crocheted everything you can find on the Internet, in magazines and books, it’s almost sure that you have a cute and fancy set of pastel rubber handle hooks, in all the possible sizes. And if you are one of those who is about to try crochet for the first time and never had a hook in your hands, don’t be afraid! Next, you will find an essential guide to diving into the fantastic universe of hooks, threads and other supplies. Always remember that high quality hooks and yarns can save you hours of frustration. Hooks and needles do have the habit of getting lost, so make sure you always have a backup, especially of the ones you love and use all the time.
Info :
Use recommended tools: hooks in the correct size for your yarn, tapestry needles, stitch markers, stuffing and pins for assembly. High quality hooks and yarns improve results and reduce frustration.
— Crochet Hook :
Info :
Crochet is a technique for creating fabric by interlocking loops of threads worked into a chain using a thin rod with a hook at the end: the crochet hook. The term crochet is derived from French and means 'small hook.' When selecting a hook, apart from size you must consider how comfortable it is for you to hold.
Info :
Author preference: the author prefers to use crochet hooks without an ergonomic handle as they feel comfortable in a knife grip; personal preferences vary.
— Anatomy of a Crochet Hook :
Info :
Point: This is the end of the hook that you insert into the stitches. Throat: This part does the actual hooking of the yarn. Shaft: Holds the loops and determines stitch size. Thumb rest: Flat part for thumb and finger. Handle: Used for balance and leverage and has many coverings and styles available.
— Sizes :
Info :
Hook sizes are indicated using different, land-specific systems: metric, UK and US. As a basic guide, the thicker the thread, the bigger the hook and stitch. If you crochet loosely, use a smaller hook to tighten the fabric; if you crochet tightly, use a larger hook to loosen it.
Info :
For amigurumi toys, the author recommends using a hook 2–3 sizes smaller than what is recommended for garments to obtain a dense fabric that will not show stuffing.
— Crochet Hook Conversions :
Info :
Conversion chart (excerpt): 2.0 mm = UK 14, 2.25 mm = UK 13 (US B/1), 2.5 mm = UK 12, 2.75 mm = C/2, 3.0 mm = UK 11, 3.25 mm = D/3, 3.5 mm = E/4, 3.75 mm = F/5, 4.0 mm = G/6, 4.5 mm = 7, 5.0 mm = H/8, 5.5 mm = I/9, 6.0 mm = J/10, 6.5 mm = K/10.5, 7 mm = 2 (UK), 8 mm = 0 (UK L/11), 9 mm = 00 (US M/13), 10 mm = 000 (US N/15).
— Materials :
Info :
Hooks were historically made from bone, glass and bakelite; today steel, aluminum, plastic, bamboo and wood are common. Stainless steel hooks under 2.00 mm are used for lace; larger hooks 2.0–3.5 mm are excellent for amigurumi with sport or light worsted (DK) weight yarn.
— Yarns :
Info :
Traditionally, crochet used very fine cotton threads; now almost any material can be used: wool, cotton, string, ribbon, fabric, leather, wire, even plastic bags or paper. Each kind of thread has pros and cons; experiment to find what suits your purpose. For toys, cotton is favored for minimal elasticity and good shape retention. Synthetic fibers like acrylic and nylon offer wide color ranges but can pill more easily.
Info :
Typical yarn weight for crochet toys is between 400 and 200 meters per 100 grams. The book provides a fiber weight chart referencing Craft Yarn Council standards (numbers 0–7 with recommended hook sizes and meters per 100 g).
— Other essential tools and supplies :
Info :
Yarn needles and tapestry needles are used for joining motifs, sewing and finishing pieces; choose an appropriate size for the yarn you’re using (author uses number 16 or 18). Pins: plastic or glass-headed are easy to see and prevent slipping. Scissors: small lightweight scissors with sharp points are ideal for this craft.
Info :
Stitch markers: use to mark rounds and key stitch locations. Stuffing: polyester fiberfill is common, inexpensive, washable and hypoallergenic. Facial features: a variety of eyes, noses, buttons, bows and ribbons may be used; safety eyes have two parts and must be fastened correctly for safety.
— Hold the hook and yarn (hand position) :
Info :
There are many ways to hold the hook: pencil grip, knife grip or others. Use whichever feels comfortable. Holding the yarn is the skill that controls tension; weave the yarn through fingers or hold it between palm and two or three fingers to maintain steady tension.
Info :
If you already know how to crochet and you feel comfortable with it, keep going. If you’re learning, try as many ways as you like to find the most suitable for you.
— Stitches :
Info :
All crochet stitches are combinations of three movements: yarn over (wrap yarn back to front), insert the hook into the stitch, draw yarn through loops on the hook. The book explains a set of basic stitches: chain (ch), slip stitch (slst), single crochet (sc), half double crochet (hdc), double crochet (dc), bobble stitches and others.
— Slip knot :
Info :
Almost all crochet works begin with a slip knot. The slip knot is the first loop you’ll need to make on your hook. The slip knot does not count as a stitch; the author sometimes secures it with a second knot.
— Slip knot steps :
Info :
1 Make a loop shape with the tail end of the yarn. 2 Insert the hook into it and draw another loop through it. 3 Pull the yarn tail to tighten the loop around the hook.
— 01 Chain stitch (abbreviation: ch) :
Info :
This stitch is the basis for most crochet works; if working in rows your first row will almost always be chain stitches, known as a foundation chain. It is also used to join motifs and as a turning stitch.
Info :
Steps: 1 Holding the slip knot, wrap the yarn from back to front around the hook (yarn over). You can wind the yarn over the hook or twist the hook to go under the yarn. 2 Draw the hook backward to pull the yarn through the loop on the hook (the slip knot). 3 You will form a new loop, which is your first chain stitch. Repeat to form as many chain stitches as required.
Info :
Note: It is crucial to hold the work firmly to prevent it from spinning around the hook every time you try to yarn over. Foundation chain: this is the string of chain stitches to crochet a flat fabric worked in rows. To help maintain an even foundation chain, keep changing your grip on the crocheted chains so you are always holding them near the hook.
Info :
Turning chain: when crocheting in rows, chain stitches bring the hook up to the height of the stitches you are crocheting. Turning chains correspond to stitch height: single crochet = 1 chain; half double crochet = 2 chains; double crochet = 3 chains. Note: when working half double crochet or longer stitches, the turning chain counts as the first stitch.
— Foundation chain and working methods :
Info :
The book covers starting from a foundation chain, crocheting in spirals (a tube), and working flat fabric in rows. It also explains differences between v and x single crochet and placement of the hook for consistent stitches.
— Additional techniques referenced in index :
Info :
Other techniques covered later in the book include bobble stitches, single rib crochet (post or relief stitch), increases and decreases (traditional and invisible), working in spirals, magic ring, crocheting around a foundation chain, changing color and joining yarn, jacquard, tapestry, fastening off, weaving in ends on flat fabric and stuffed pieces, embroidery, joining parts (sewing), joining open pieces, and joining an open end piece with a closed piece.
This charming collection of Pica Pau amigurumi patterns invites you to create whimsical animal friends with attention to detail and durable construction. Whether you are making one toy or a whole gang, these designs emphasize neat finishing and joyful color choices. Enjoy the process, experiment with yarns and sizes, and make each friend truly your own. 🧶🧵